Membangun Mini Weather Station Real-Time dengan Wemos D1 Mini dan Layar TFT ST7789 (API OpenWeatherMap)
📘 Tutorial: Membuat mini weather station menggunakan wemos D1 mini dan tft display, sangat cocok untuk hiasan kamar anda ✨.
📌 1. Tujuan
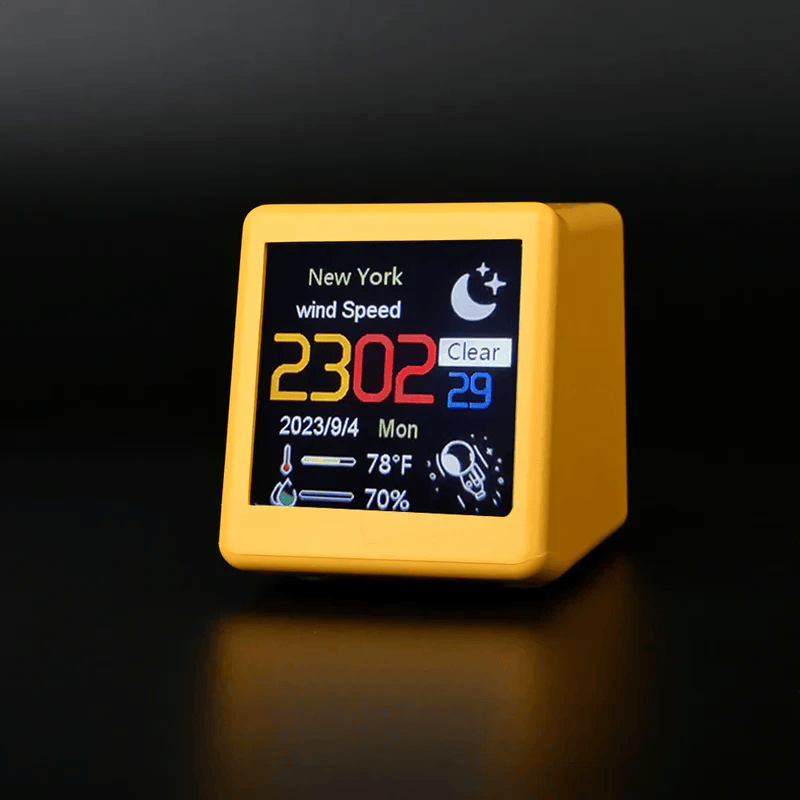
Halo teman-teman maker dan penggemar DIY! Pada tutorial kali ini, saya akan sedikit membagikan cara membuat hiasan modern dan aesthetic berupa perangkat stasiun cuaca mini. Perangkat ini mampu menampilkan informasi real-time seperti: cuaca saat ini, suhu, kelembapan, waktu, lokasi, tanggal/bulan/tahun semuanya ditampilkan dengan sangat indah pada layar TFT Display ST7789.
“🗣️Darimana semua data yang kita perlukan diambil bang?”
Data cuaca diambil langsung dari API yang telah kita buat di OpenWeatherMap. untuk caranya nanti saya akan buatkan dalam satu tutorial khusus. sediktit penjelasan pada alur sistem alat weather stations ini, ketika perangkat weather station yang kita flash dengan program terkoneksi ke internet/WiFi, program alat kita secara otomatis meminta seluruh data ke server OpenWeatherMap, data yang masuk masih dalam format JSON yaaa, setelah data berhasil didapatkan, kemudian akan dikonversi ke tampilan gambar, atau gif sesuai dengan ketentuan yang kita buat dalam kode program.
“🗣️bisa custom gambarnya dong bang?”
bagus, betul sekali, jadi sebenarnya anda dapat membuat sendiri custom gambarnya, dengan cara mengkonversi gambar dari format (jpg,png,dll) ke format array atau Hex. mungkin nanti saya akan buatkan juga bagaimana cara membuat custom tampilan layarnya sesuai dengan gambar yang kita inginkan.
Keren, kan? dan pastinya agak pusing juga sih
gapapa kok, saya juga pusing, kita sama sama pusing aja 😅
Tidak perlu sensor fisik, cukup WiFi + API = stasiun cuaca mini yang cerdas! 🚀 setelah kita sudah sedikit memeahami cara kerja atau alur dari alat yang akan kita buat, kita lanjut ke tahap kedua. —
🧰 2. Alat dan Bahan
| Komponen | Jumlah | Keterangan |
|---|---|---|
| Wemos D1 Mini (ESP8266) | 1 | Mikrokontroler dengan WiFi |
| Layar TFT ST7789 (240x240) | 1 | Layar tampilan 1.3” atau 1.54” |
| Kabel Jumper | Bebas | Untuk koneksi antar komponen |
| Breadboard | 1 | Opsional, untuk testing |
| Akses Internet + API Key | 1 | API Dari https://openweathermap.org |
| Daya USB / Powerbank | 1 | Daya Perangkat |
📚 3. Teori Singkat
sedikit teori singkat mengenai bahan - bahan yang akan kita gunakan dalam project kali ini diantaranya adalah :
- Wemos D1 Mini adalah board mikrokontroller kecil dengan menggunakan chip dari ESP8266 yang memiliki fitur koneksi WiFi, sangat cocok untuk proyek IoT skala kecil.”
- TFT Display ST7789 adalah modul layar TFT SPI dengan resolusi 240x240 piksel.
- OpenWeatherMap API menyediakan data cuaca gratis dengan format JSON Gambar ikon cuaca dapat ditampilkan pada layar berdasarkan kondisi seperti
clear,clouds,rain, dll.
⚙️ 4. Langkah-Langkah Pembuatan
Koneksi Pin Perangkat
| ST7789 Pin | Wemos D1 Mini | Keterangan |
|---|---|---|
| VCC | 3V3 | Power |
| GND | GND | Ground |
| SCL (CLK) | D5 (GPIO14) | SPI Clock |
| SDA (MOSI) | D7 (GPIO13) | SPI Data |
| RES (RST) | D4 (GPIO2) | Reset |
| DC | D3 (GPIO0) | Data/Command |
| CS | GND | Bisa di-GND-kan bila tidak digunakan |
⚠️ Pastikan daya awal layar Anda menggunakan 3.3V (bukan 5V), untuk meminimalisir kerusakan pada layar, jika tidak menyala ataupun menyala tetapi terdapat glitch pada tampilannya, maka anda baru boleh menaikan dayanya menggunakan 5V, tetapi pastikan arus tidak lebih dari 200mA!
💻 Instalasi Library
Pastikan anda telah menginstal library yang diperlukan di Arduino IDE antara lain sebagai berikut:
- Board: ESP8266 by ESP8266 Community
- URL Board Manager:
http://arduino.esp8266.com/stable/package_esp8266com_index.json
- URL Board Manager:
- Library yang dibutuhkan:
Adafruit ST7789Adafruit GFXESP8266WiFiArduinoJsonESP8266HTTPClient- (Opsional)
TJpg_Decoderuntuk menampilkan gambar.jpg
✏️ Contoh Kode Program
1
2
3
4
5
6
7
8
9
10
11
12
13
14
15
16
17
18
19
20
21
22
23
24
25
26
27
28
29
30
31
32
33
34
35
36
37
38
39
40
41
42
43
44
45
46
47
48
49
50
51
52
53
54
55
56
57
58
59
60
61
62
63
64
65
66
67
68
69
70
#include <ESP8266WiFi.h>
#include <Adafruit_GFX.h>
#include <Adafruit_ST7789.h>
#include <ArduinoJson.h>
#include <SPI.h>
#include <ESP8266HTTPClient.h>

#define TFT_CS    -1
#define TFT_RST   D4
#define TFT_DC    D3

Adafruit_ST7789 tft = Adafruit_ST7789(TFT_CS, TFT_DC, TFT_RST);

const char* ssid = "NAMA_WIFI";
const char* password = "PASSWORD_WIFI";
const String apiKey = "API_KEY_OPENWEATHERMAP";
const String city = "Bandung";
const String countryCode = "ID";

void setup() {
  Serial.begin(115200);
  tft.init(240, 240);
  tft.setRotation(2);
  tft.fillScreen(ST77XX_BLACK);
  tft.setTextColor(ST77XX_WHITE);
  tft.setTextWrap(true);

  WiFi.begin(ssid, password);
  tft.println("Connecting to WiFi...");
  while (WiFi.status() != WL_CONNECTED) {
    delay(500);
    tft.print(".");
  }

  tft.println("WiFi connected.");
}

void loop() {
  if(WiFi.status() == WL_CONNECTED) {
    HTTPClient http;
    String endpoint = "http://api.openweathermap.org/data/2.5/weather?q=" + city + "," + countryCode + "&appid=" + apiKey + "&units=metric";

    http.begin(endpoint);
    int httpCode = http.GET();

    if (httpCode == 200) {
      String payload = http.getString();
      StaticJsonDocument<1024> doc;
      deserializeJson(doc, payload);

      String weather = doc["weather"][0]["main"];
      float temp = doc["main"]["temp"];
      int humidity = doc["main"]["humidity"];

      tft.fillScreen(ST77XX_BLACK);
      tft.setCursor(0, 0);
      tft.setTextSize(2);
      tft.print("Kota: "); tft.println(city);
      tft.print("Cuaca: "); tft.println(weather);
      tft.print("Suhu: "); tft.print(temp); tft.println(" C");
      tft.print("Lembab: "); tft.print(humidity); tft.println(" %");
    } else {
      tft.println("Gagal mengambil data");
    }

    http.end();
  }

  delay(60000); // Update tiap 60 detik
}